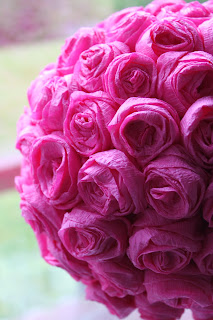
I found this amazing tutorial on how to make crepe paper rosettes on The Idea Room. I used the tutorial and made a pair of rosette topiaries. Here is my version - step by step.
First, I built the topiary structure. I used 24" styrofoam balls, cuttings of birch saplings from my yard, styrofoam block and metal flower tins.
Next, I started crafting the crepe paper rosettes using the tutorial I posted above. My first attempts were horrendous! I actually clicked into the additional video clip and it made things much easier to follow. As you get used to twisting and wrapping it becomes easy and you will get much quicker at it. Relax, the roses look prettier the less uptight you become about them.
Once I had finished my first roll of crepe paper, I started hot gluing the roses onto the styrofoam ball to get a sense of how many I would need to craft. The answer... a lot! I used a full six rolls of crepe paper and should have used a seventh.
Here, the result is just a funny topiary toupee.
And so, keep on wrapping. I have to say, I love the rosettes all just sitting together in a single layer in a shallow tray. I was resting mine in a shallow black enamelled tray and the pink just popped against it. I think I will make an arrangement in the tray sometime.
Here is the topiary completed. The rosettes really fill the ball out and it looks all lovely and puffy and pretty. I did go and steal some moss off the base of a tree to wrap around the bottom, but apparently forgot to take a photo of it in its completed stage. I had also planned to tie a ribbon around either the stem or the metal base, but didn't. I think if I repeat this craft for Christmas I will do so to make it even more festive.
Here is one final closeup of the topiary ball covered in rosettes. In the end I decided that I preferred the roses more loosely wrapped. They created a fuller, vintage English rose look.
Sadly, I am not keeping these topiaries at home for my own enjoyment. These went back to work with me where they were used as a table decoration for a Diamond Jubilee party.
And, while it is raining again this week, I will say that rainy days do have some merit. How gorgeous does my bleeding heart look covered in raindrops?
PS... these topiaries would be fantastic decoration for a wedding, shower, or any party. If you are in the Halifax area and might be interested in ordering some, drop me a note. :)


2 comments:
Beautiful
Beautiful!
Post a Comment